Now that you have installed DNTV Live!, please open it by double clicking
on the desktop icon.

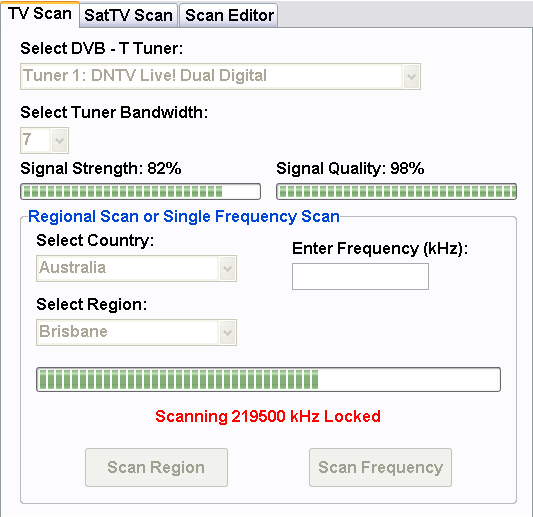
You will be presented with an ' Initial Scan ' window. Before you can start
using DNTV Live! you need to scan for channels for either DVB-T system , DVB-S
system, FM radio or all of these. If you have tuner cards installed that
support all these systems you will be presented with tabs as seen below. If
your tuner card does not support some of these systems then the relevant tab
will be missing.
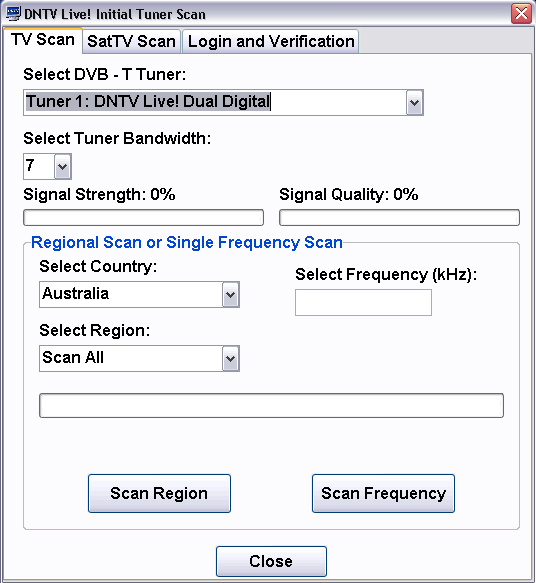
Click on the down arrow under ‘Select Country’ to select AUSTRALIA.
Then select your region, if your region is not listed please select ‘Scan
All’. NOTE:
Do not interrupt the scanning process or try and use
your computer while scanning. It is somewhat cpu intensive at times during
the scanning process. Now click on the larger button ‘Scan Region’.
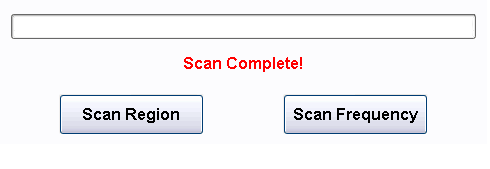
DNTV Live! will now scan for channels, this process normally takes approximately
3 minutes. Once completed, 100% Scan Completed will be displayed.
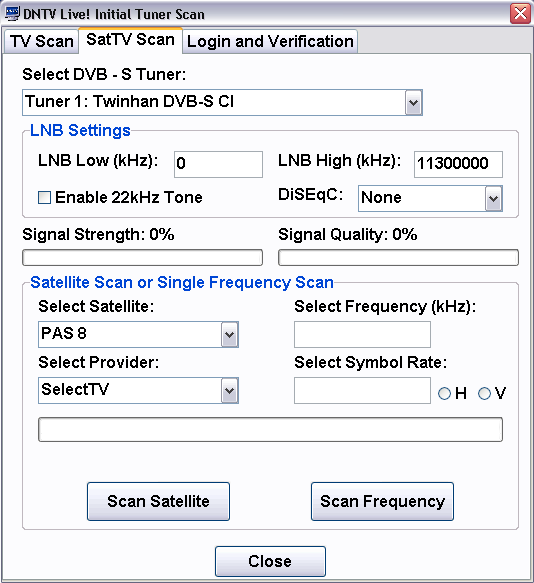
You can repeat the steps above with the DVB-S tuner making sure you set
your Sat Dish LNB frequencies correctly for High and Low band if required.
Then choose the satellite and provider you wish to scan.
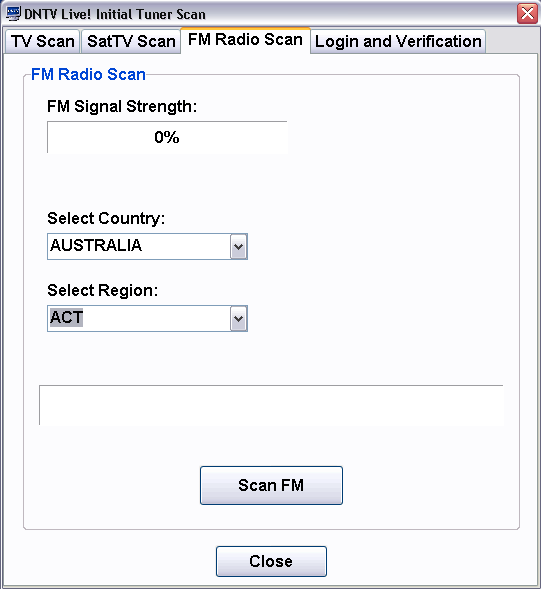
Similarly you can scan any FM signal in your area.

You may be required to enter a User Name and Serial Number supplied by
DigitalNow to enable detection of your device.
After the scan has completed, you can close that window.
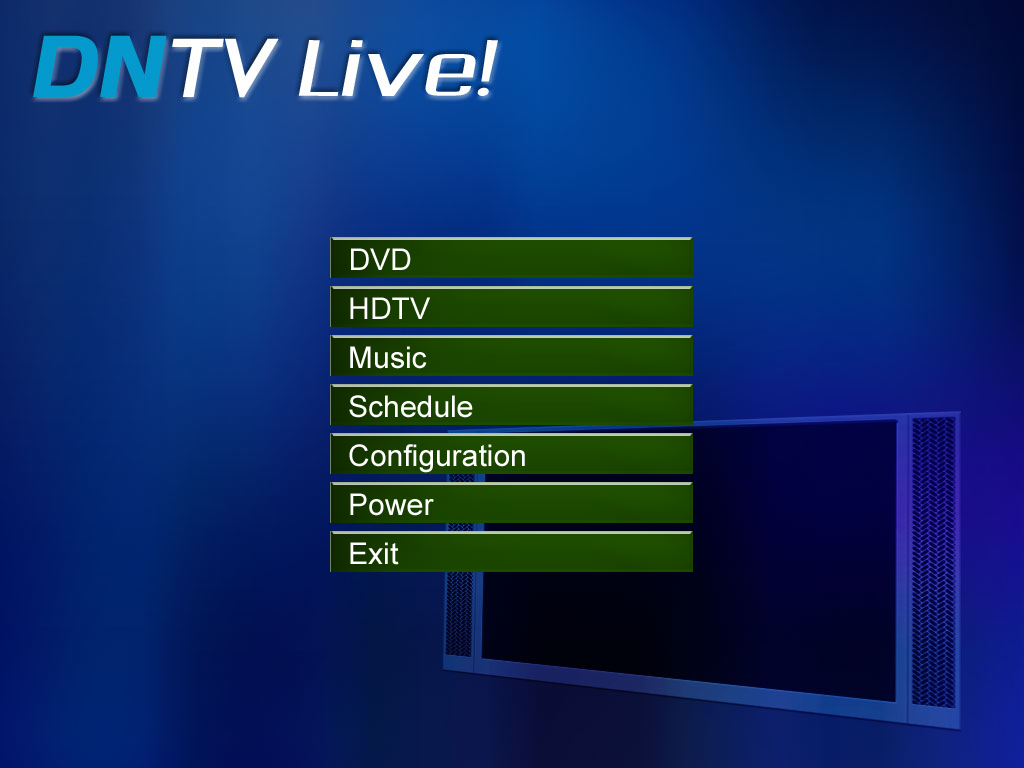
You will now be presented with the window mode homepage of DNTV Live!

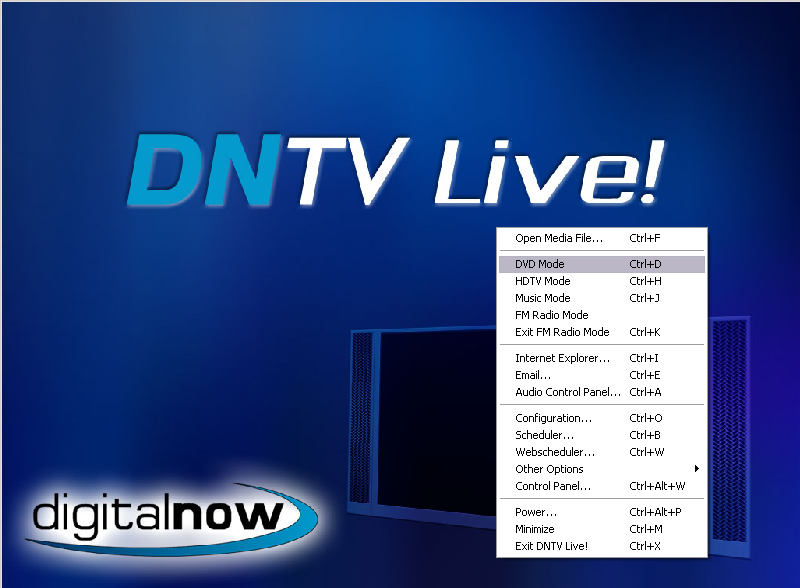
Right click on the window in window mode to bring up the menu on the
homepage.
Enter fullscreen mode via the Remote or by double clicking on the DNTV
Live! window to view the keyboard interface of the fullscreen mode homepage.
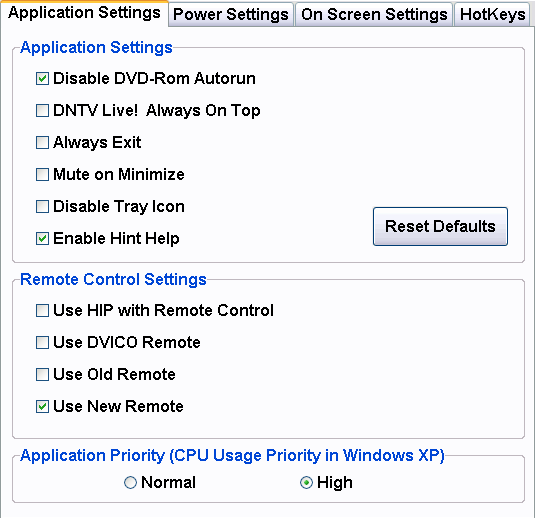
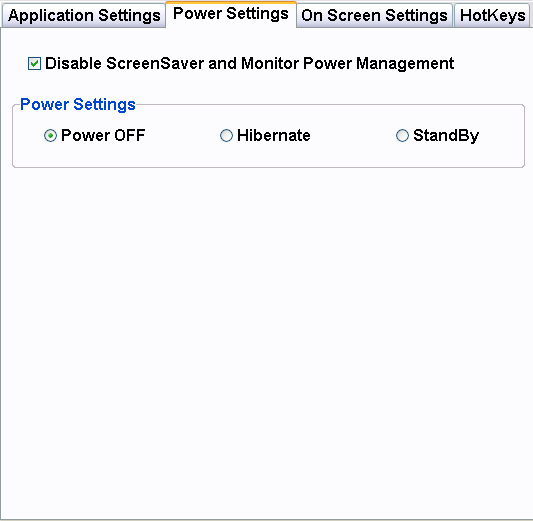
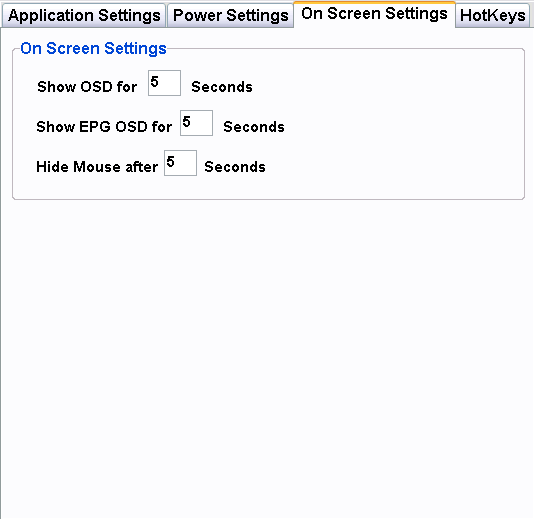
On the window mode menu or in fullscreen mode, click on Configuration. A window will appear, and here you can set all the
options for DNTV Live!
In the options window , click on Tuner Scan.
Click on the down arrow under ‘Select Country’ to select AUSTRALIA.
Then select your region, if your region is not listed please select ‘Scan
All’.
Now click on the larger button ‘Scan Region’.
DNTV Live! will now scan for channels, this process normally takes approximately
3 minutes. Once completed, 100% Scan Completed will be displayed.
To see a list of all the channels scanned, please move down to HDTV
Channel Editor.
For FM Radio, click on the FM Radio tab next to TV Scan.
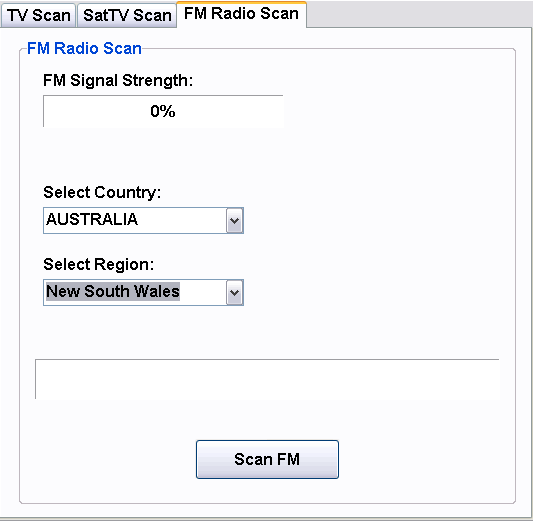
Click on the Scan FM button to scan for FM Radio stations in your area.
Once completed, please move down to FM Radio Settings
for a list of stations found during the scan.
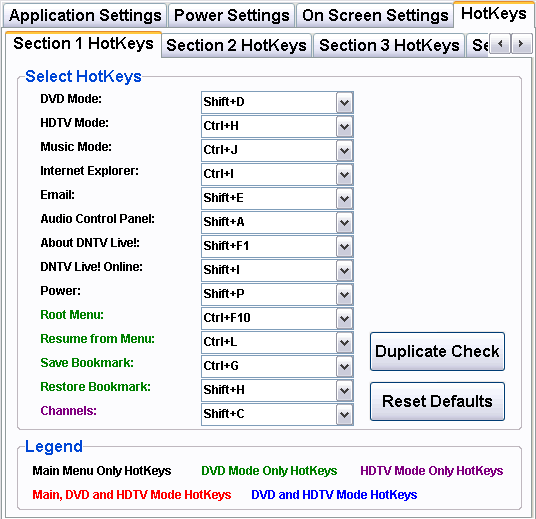
- TV Channel Editor – Here you can personalise your
channels by renaming /deleting them, adding/removing from a favourites list, adding a key number and adding a
network logo. This is also useful for changing PID information and
frequencies – however this is not recommended and is only useful for
advanced users.
- Preset Keys (0 - 9) - preset keys and hotkeys for channel navigation have been
implemented and is activated by checking "Use DVICO Remote" in the General
Settings section of the Configuration dialog. Added hotkeys include:
. F6 PiP hotkey
. F7 HDTV channel hotkey
. F8 EPG / Guide channel hotkey
These hotkeys can be used in conjunction with preset channel number keys
configured in the TV Channel Editor section of the Configuration dialog.
Thus you can now assign a single channel preset number key 0-9 with an
associated hotkey to indicate to the application which sub channel you wish
to change to within the Main window or PiP window. (e.g 9 Digital assigned
Preset Number 9, 9 High Definition is assigned Preset Number 9 and HDTV
Channel Checkbox is checked, 9 Guide is assigned Preset Number 9 and EPG /
Guide Channel Checkbox is checked. With this configuration, for main window
operation you can press 9 for 9 Digital, F7, then 9 for 9 High Definition and F8,
then 9
for 9 Guide. Similarly for PiP window operation you can press F6, then 9 for 9
Digital, F6, then F7, then 9 for 9 High Definition and F6, then F8, then 9 for 9 Guide). These
hotkeys will automatically deactivate so the user can always assume they are
in the deactivated state.
- Preset Keys (0-999) - This preset key mode is activated by
default. Any preset channel number keys (0 - 999) configured in the TV
Channel Editor section of the Configuration dialog can be activated by
pressing enter key after the preset (e.g. 122 enter).
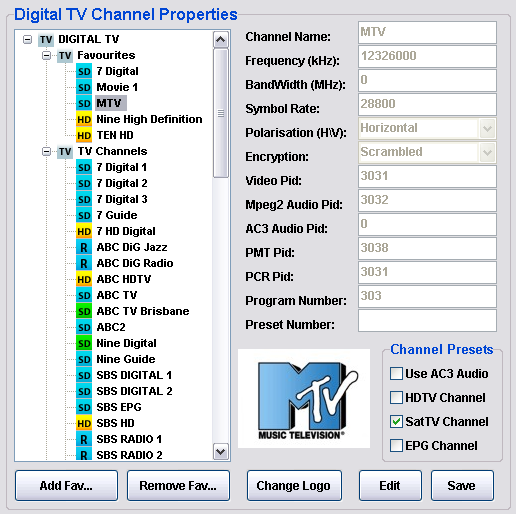
- To edit a channels information, firstly click on the channel you wish
to edit. Then click the ‘EDIT’ button. This will enable you
to change the current information to suit you. Once you have made the desired
changes, click the ‘SAVE’ button.
- By adding a ‘Preset Key’ number, this allows direct access
to that channel via the number you enter either by remote control or keyboard
number pad. Once you have added the number, click the ‘SAVE’
button.
- To delete a channel, eg a repeated channel such as ABC TV, click on
the channel, then right click and select ‘Delete Digital Channel’
- To add or remove channels to and from the favourites tree node press
the appropriate buttons Add Fav... or Remove Fav...
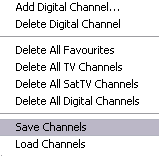
- The channel list can also be saved or loaded for backup purposes by
choosing the appropriate menu item. The list is saved to a file called
channels located in the DNTV Live! directory.
- Channel Logos appear when changing channels in the OSD.
- To add a channel logo, select the channel name then press the 'Change
Logo' button. Logos are stored in ' Images ' in the DNTV Live! Application
folder. There are 2 folders, called Metro (NINE, 10, SEVEN, D44, ABC, SBS)
and Regional (WIN, PRIME, SC10, ABC, SBS) Open the appropriate folder for
your area and select the appropriate channel logo for the channel.
- Logos for all stations have been provided, however some may not be available
for a particular broadcast in your area. If you have a logo that we have
not included, please e-mail us and attach the logo. We may add it to future
versions of DNTV Live!
- Example: Nine HDTV logo in HDTV Settings:

FM Radio Settings
Here you can edit the station names and preset numbers for each station found
in the FM Radio scan.
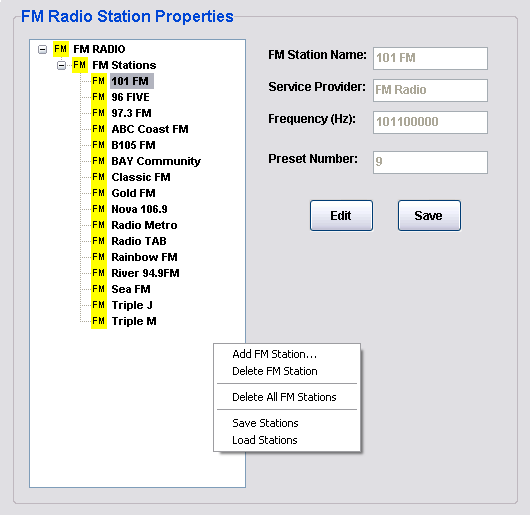
Click on a station name, then change the desired settings. Click on the
Save button when you are done. The station name that you nominate here will
reflect what is shown in the FM Radio menu.
FM stations can also be added, deleted or saved/loaded for backup purposes by
selecting the appropriate menu item from the popup menu.
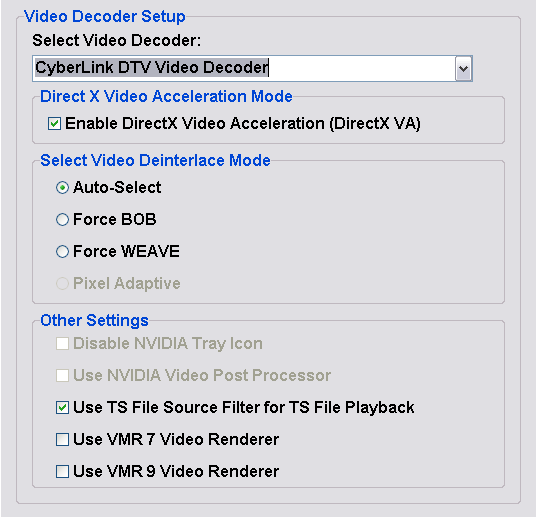
Click on ‘Video Decoder Settings’. Your package includes the
DNTV Live! Video and Audio Decoders which are chosen by default. You can also choose
other supported decoders, but you must have these installed in your PC for DNTV
Live! to be able to use them.
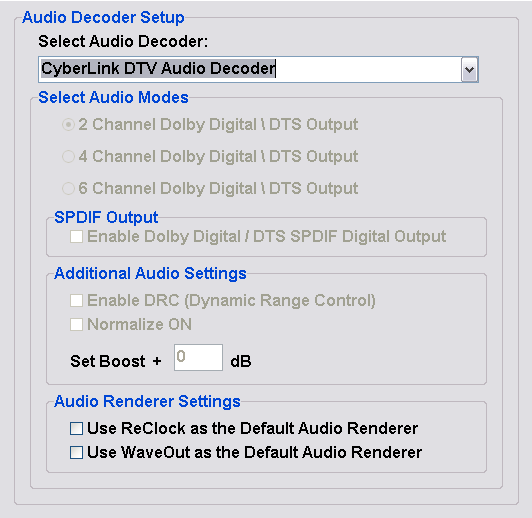
The Audio Decoder can be chosen from many different vendors, the supplied DNTV Live! Decoder
is a good one.
When using the DNTV Live!
Audio Decoder you will be able to select a number of options, including SPDIF
output if supported by your sound card. Other vendors audio decoder
properties are accessible when TV, DVD or recordings are playing by pressing
F3.
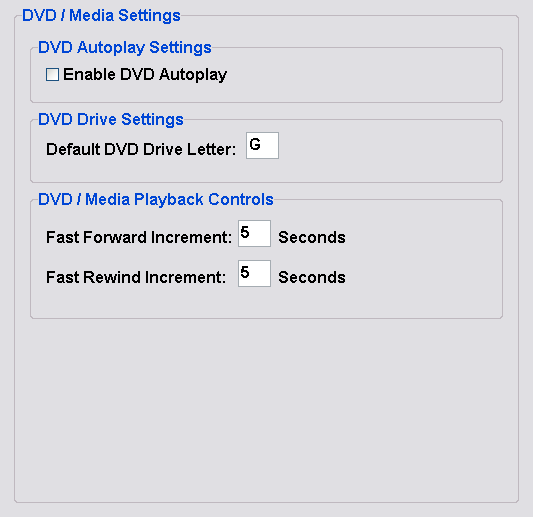
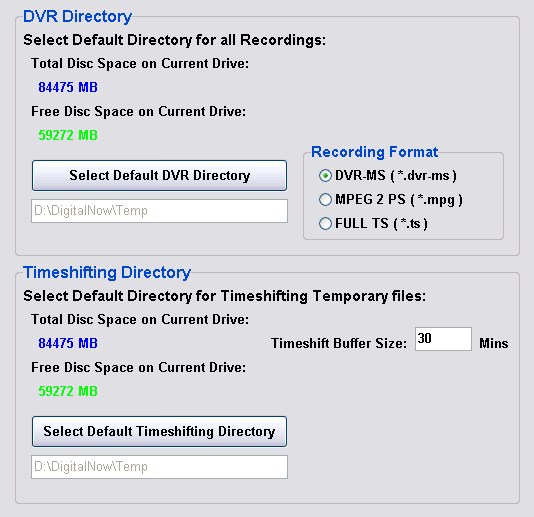
- DVR (Digital Video Recording) Directory - Select Default
Directory for all Recordings – This lets you change where all your
recordings are stored. This is particularly useful if you have multiple
hard drives.
- Recording Format
- DVR-MS – This is the default recording format.
It supports all formats and is strongly recommended for recording of
High Definition broadcasts. When recording FM radio mpeg 2 is the only
available option and will be default.
- MPEG 2 PS – Best results are gained using this format
when
recording Standard Definition broadcasts, it allows for recording to
a MPEG 2 compatible file.
- Full TS – This option is not recommended as
it will quickly take up hard disk space. It records the ENTIRE stream
broadcasted, and is generally used for testing purposes. It does support
the recording of all formats. When recording FM radio this will result
in a raw wav file format (.wav).
- Timeshifting Directory - Select Default Directory
for Timeshifting Temporary files – This lets you select the directory
where the Timeshifting buffer files will be kept. These are deleted
when you close DNTV Live!
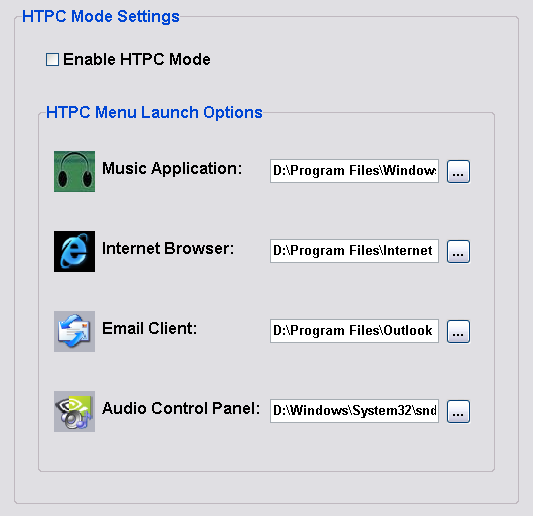
- File Association - Described below are the steps
required to associate popular Media file types so that when accessed from
within the Windows shell, they will automatically be played back by DNTV
Live!.
- Step 1 – Open up windows explorer and click
on Tools -> Folder Options. Then choose the file extension of the media
file type you wish to associate with DNTV Live!. Highlight the file type
extension and click Advanced.
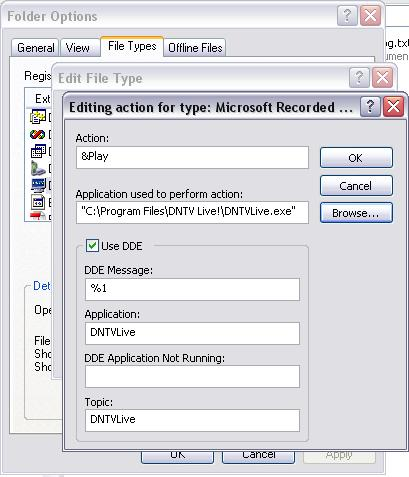
- Step 2 – An Edit File Type dialog will
appear. Here you can change the icon associated with this file type and
its description. Below this you will find an actions box. Select the
actions that appear in this box one by one and click Edit. The following
dialog will appear. You need to amend the information in this dialog so
that it contains the same information as the diagram below. Once you
have completed this for each action you are ready to go.
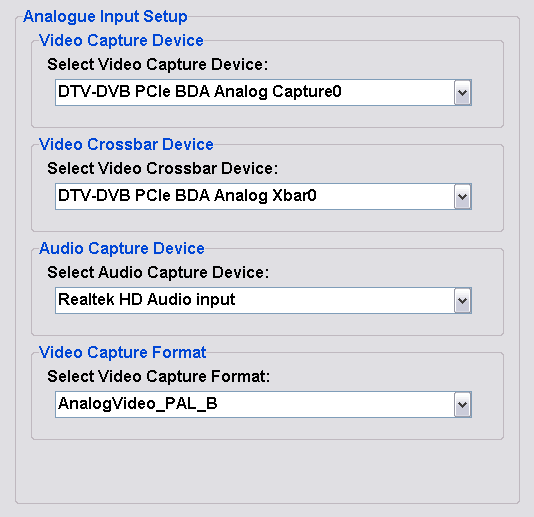
Analogue Input Setup
DNTV Live! supports the analogue inputs available on your DNTV Live! card
or your DVICO Fusion Gold or Plus versions. The two available analogue
connectors (S-Video and Composite) on these cards can be accessed from within
HDTV Mode (Main window or PiP window) or within DVD Mode (PiP window only).
To setup the analogue capabilities of your DNTV Live! or DVICO card you first
need to setup the analogue inputs within the configuration dialog. Luckily
DNTV Live! is smart enough to set this up for you automatically but if you
need to change from the default then below shows you the various settings
available to you.
- Video Capture Device - This allows you to choose the appropriate
capture device for use within DNTV Live! (Note: If you have two or more DNTV
Live! cards installed or a combination of DNTV Live! and DVICO cards, only
Tuner 1's analogue inputs are available for use). Pressing F2 will give you
access to this devices filter property page.
- Video Crossbar Device - This allows you to choose the appropriate
crossbar device to control the connector (S-Video or Composite) input on
your card.
- Audio Capture Device - This allows you to choose the appropriate
audio capture device for the analogue audio. Pressing F3 will give you
access to this devices filter property page.
- Video Capture Format - Changing this option will change the video
format of the capture device. (Australia uses PAL_B).